DIGIT: Internal Datamart Deployment Steps
Steps for setting up the environment and running the script file to get a fresh copy of the required Datamart CSV file.
Steps for setting up the environment for running the script
(One Time Setup)
Install Kubectl Step 1: Go through the Kubernetes documentation page to install and configure the kubectl. Following are useful links: Kubernetes Installation Doc Kubernetes Ubuntu Installation
After installing type the below command to check the version install in your system1 kubectl version
Step 2: Install aws-iam-authenticator
Installing aws-iam-authenticator - Amazon EKS
Step 3: After installing, you need access to a particular environment cluster.
Go to $HOME/.Kube folder
1cd 2cd .kube
Open the config file and replace the content with the environment cluster config file. (Config file will be attached)1gedit config
Copy-paste the content from the config file provided to this config file opened and save the file.
2. Exec into the pod1kubectl exec --stdin --tty playground-584d866dcc-cr5zf -n playground -- /bin/bash
(Replace the pod name depending on what data you want.
Refer to Table 1.2 for more information)
3. Install Python and check to see if it installed correctly1apt install python3.8 2python --version
4. Install pip and check to see if it installed correctly1apt install python3-pip 2pip3 --version
5. Install psycopg2 and Pandas1pip3 install psycopg2-binary pandas
Note: If this doesn’t work then try this command1pip3 install --upgrade pip
and running the #5 command again
Steps for setting up the environment for running the script
(Every time you want a datamart with the latest data available in the pods)
1. Sending the python script to the pod1tar cf - /home/priyanka/Desktop/mcollect.py | kubectl exec -i -n playground playground-584d866dcc-cr5zf -- tar xf - -C /tmp
Note: Replace the file path (/home/priyanka/Desktop/mcollect.py) with your own file path (/home/user_name/Desktop/script_name.py)
Note: Replace the pod name depending on what data you want.
(Refer to Table 1.2 for more information on pod names)
2. Exec into the pod1kubectl exec --stdin --tty playground-584d866dcc-cr5zf -n playground -- /bin/bash
(Note: Replace the pod name depending on what data you want.1kubectl exec --stdin --tty <your_pod_name> -n playground -- /bin/bash
Refer to Table 1.2 for more information)
3. Move into tmp directory and then move into the directory your script was in1cd tmp 2cd home/priyanka/Desktop
for example :1cd home/<your_username>/Desktop
4. List the files there1ls
(Python script file should be present here)
(Refer Table 1.1 for the list of script file names for each module)
5. Run the python script file1python3 ws.py
(name of the python script file will change depending on the module)
(Refer Table 1.1 for the list of script file names for each module)
6. Outside the pod shell, In your home directory run this command to copy the CSV file/files to your desired location1kubectl cp playground/playground-584d866dcc-cr5zf:/tmp/mcollectDatamart.csv /home/priyanka/Desktop/mcollectDatamart.csv
(The list of CSV file names for each module will be mentioned below)
7. The reported CSV file is ready to use.
Jupyter vs Excel for Data Analysis
Jupyter
Excel
Using jupyter will be command-based.
Will take some time getting used to it.
Ease of Use with the Graphical User Interface (GUI). Learning formulas is fairly easier.
Jupyter requires python language for data analysis hence a steeper learning curve.
Negligible previous knowledge is required.
Equipped to handle lots of data really quickly. With the bonus of ease of accessibility to databases like Postgres and Mysql where actual data is stored.
Excel can only handle so much data. Scalability becomes difficult and messy.
More Data = Slower Results
Summary:
Python is harder to learn because you have to download many packages and set the correct development environment on your computer. However, it provides a big leg up when working with big data and creating repeatable, automatable analyses, and in-depth visualizations.
Summary:
Excel is best when doing small and one-time analyses or creating basic visualizations quickly. It is easy to become an intermediate user relatively without too much experience dueo its GUI.
How to install and configure jupyter to analyze the datamart
Watch this video
![]() How To Install Jupyter Notebook In Ubuntu Linux
How To Install Jupyter Notebook In Ubuntu Linux
OR
Follow these steps ->
(One Time Setup)
Install Python and check to see if it installed correctly
1apt install python3.8 2python --version
Install pip and check to see if it installed correctly
1apt install python3-pip 2pip3 --version
3. Install jupyter1pip3 install notebook
(Whenever you want to run Jupyter lab)
To run jupyter lab
1jupyter notebook
2. To open a new notebook
New -> Python3 notebook
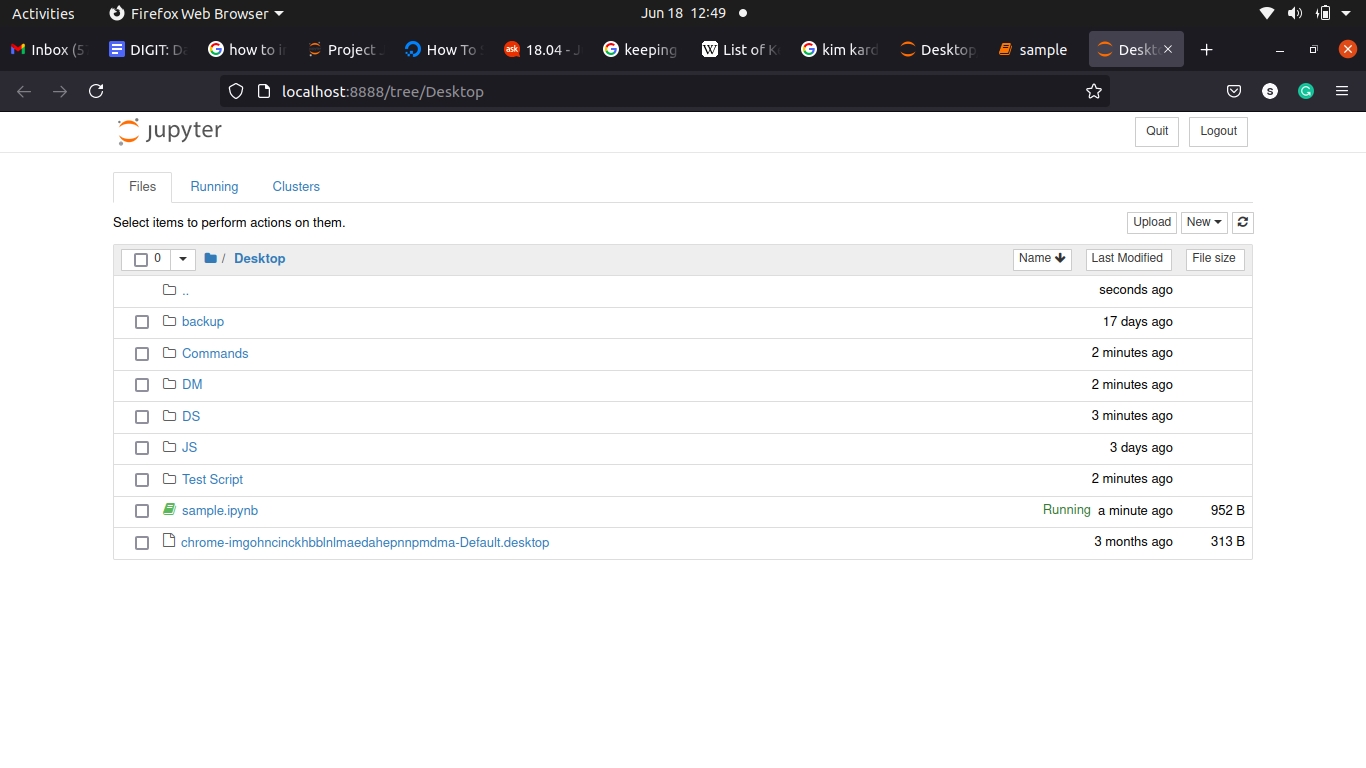
3. To open an existing notebook
Select File -> Open
Go to the directory where your sample notebook is.
Select that notebook (Ex: sample.pynb)
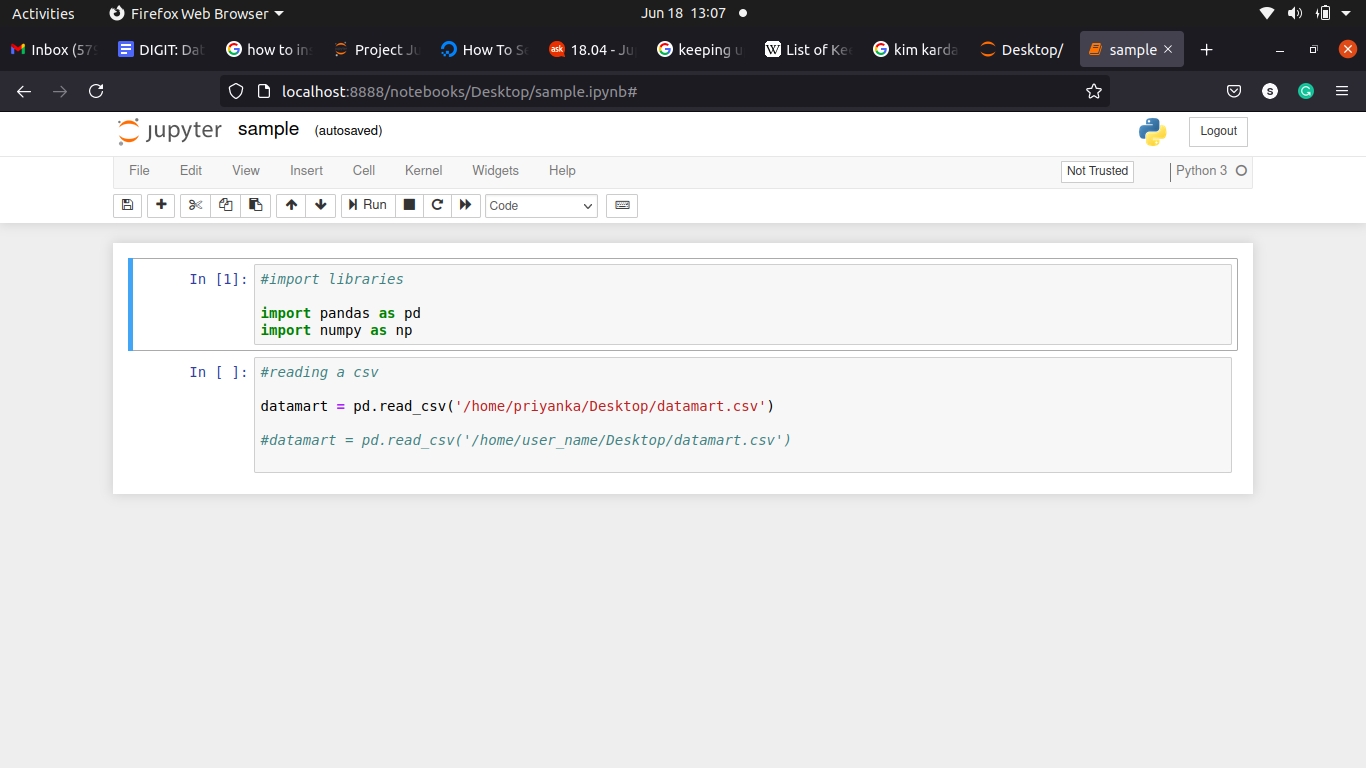
Opening an existing notebook

After opening

Table 1.1 - File Names for each Module
Module Name
Script File Name (With Links)
Datamart CSV File Name
Datamart CSV File Name
Table 1.2 - Pod Names for each Module
Module Name
Pod Name
Description
PT
playground-865db67c64-tfdrk
Punjab Prod Data in UAT Environment
W&S
playground-584d866dcc-cr5zf
QA Data
PGR
Local Data
Data Dump
mCollect
playground-584d866dcc-cr5zf
QA Data
TL
playground-584d866dcc-cr5zf
QA Data
Fire Noc
playground-584d866dcc-cr5zf
QA Data
OBPS (Bpa)
playground-584d866dcc-cr5zf
QA Data
All content on this page by eGov Foundation is licensed under a Creative Commons Attribution 4.0 International License.
Was this helpful?