Deployment Of App on Play Store
Overview
In this document, we are coming to learn how to upload APK to the play store and make it available to the end user to download and use it from the play store.
Pre-requisites
Before starting the process of uploading the apk to the play store the following requirements are a must.
Make sure that the signed apk (signed apk has a key generated, which is used to release different versions of the apk) is generated for the application that you want to upload to the play store.
Make sure that you have a Google Play account and agree to the stated terms and conditions. The payment must be completed for the account before it is ready for uploading an apk to the play store.
two screenshots of your app and they must be at least 320 pixels wide and be in a PNG or JPEG format.
You must also add your high-resolution app icon. It must be 512 by 512 pixels and it must be in 32-bit PNG format. This icon will be visible on the Google Play app’s page and in search results.
Upload a feature graphic image, that will be visible at the top of the Google Play app’s page. This image must be 1024 by 500 pixels, and maybe in JPEG or 24-bit PNG format.
Also, prepare a small description of the app in four to five lines.
Key Functionalities
The use of deploying the apk to the play store is to enable the user to download the apk from the play store and use it whenever needed. By uploading the apk to the play store our app will be available to all end-users around the world at their fingertips.
Deployment Details
Now, we are going to learn step by step procedure of uploading apk to the play store.
Open the Google Play console by entering the URL (https://play.google.com/apps/publish/) and log in with the user credentials.
After login in the following screen can be seen.
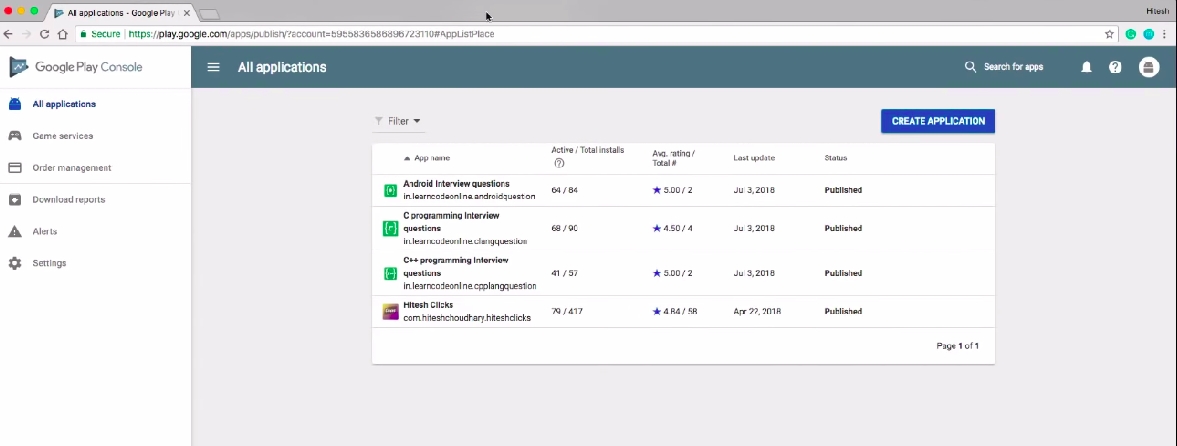
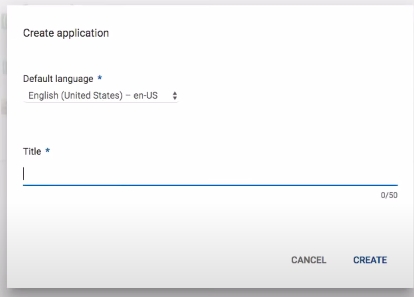
Now on the top-right click on the Create Application button and you get a popup to enter the title of the apk. Refer to the screenshot below and click on create.
After clicking the create you will be redirected to the page where we need to enter the product details, graphics assets, categorization ..etc
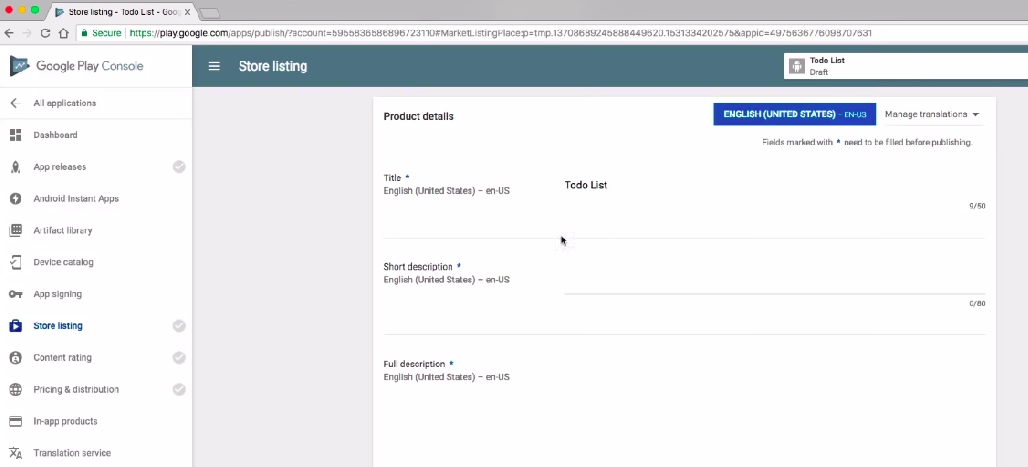
Under the Product Details section, enter the description that we have prepared in the beginning.
Under the assets section, we need to attach at-least two screenshots of the application, a high-resolution thumbnail icon and a feature graphic image.
Under categorization, select the application type and category.
Coming to the contact section, add the website URL, email and also phone number if you wish to add one.
After next comes the privacy policy section where you can enter the link to the privacy and policy page and save it as a draft.
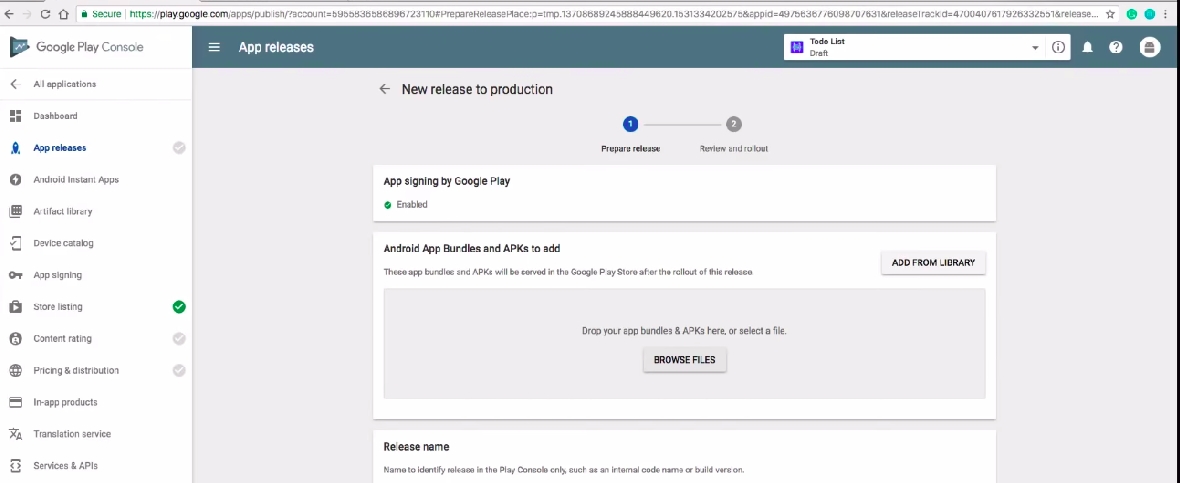
After saving as a draft on the “right side menu” select the option “App Release”. In the app release page under the “production track” click on Manage. Click on create a release on the next screen. Click on Continue on the next page under the “ App signing by google play”.
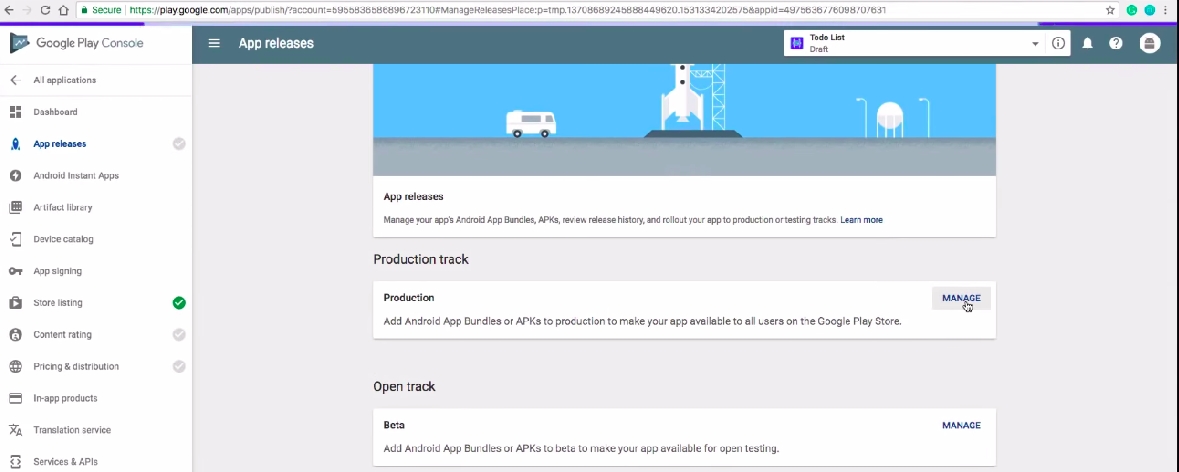
In the next page, under android app bundles and APK to add section add your APK generated also enter the release name and add the description inside the <en-US> tag related to that APK and save the entered data.
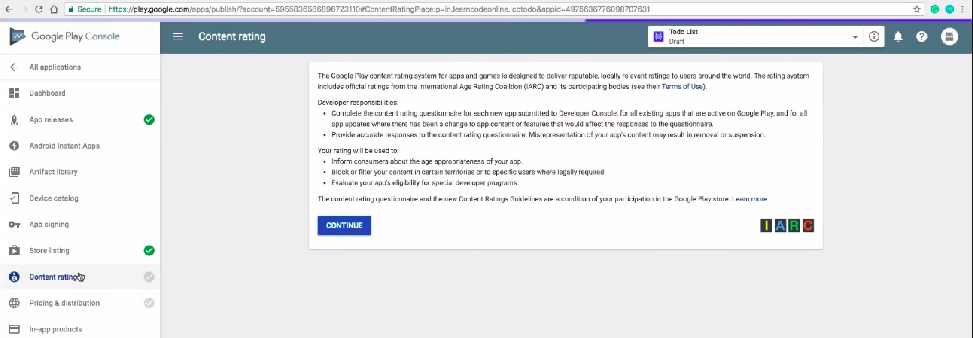
Now in the right side menu to the “content rating” and click on continue button which will redirect to “Welcome to the Content Rating Rating Questionnaire page”, where we need to enter the email id and also select your app category in provided categories and fill all the Questionnaire in the form that comes after selecting the app category and click on the “save Questionnaire”, you will receive an email after clicking on the “save Questionnaire”.
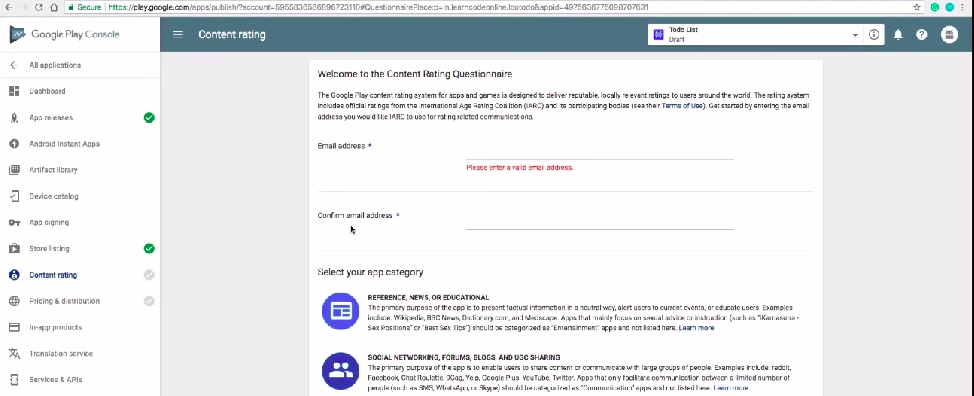
After that click on the “calculate Rating” then in the click “apply Rating Button”.
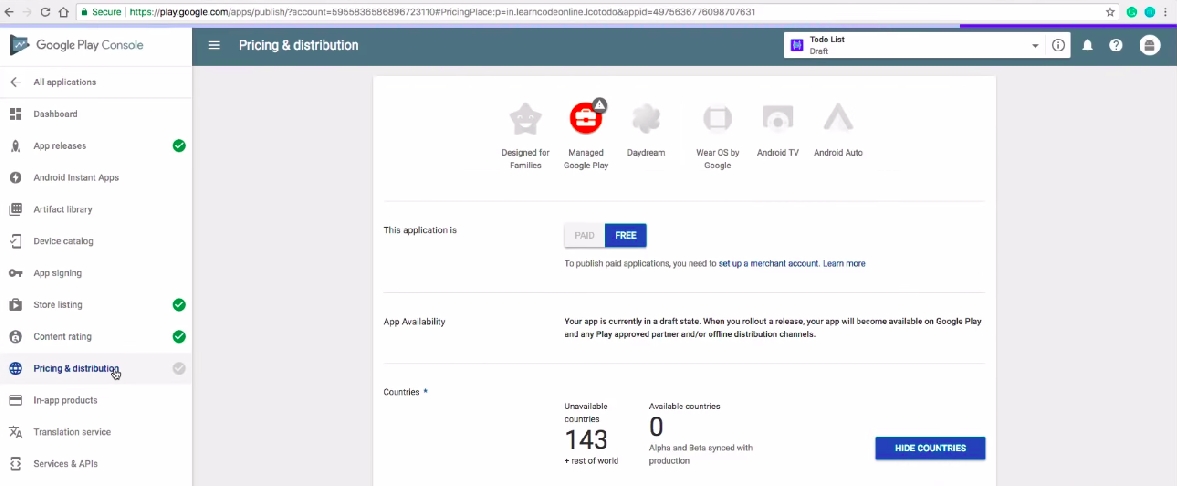
Next will be the “Pricing and Distribution” in the “Right side Menu”. In this page we have the option to select the cost of APK to download or free, also select the countries app needs to be available and also answer the questionnaires that are asked and click on the save Drafts.
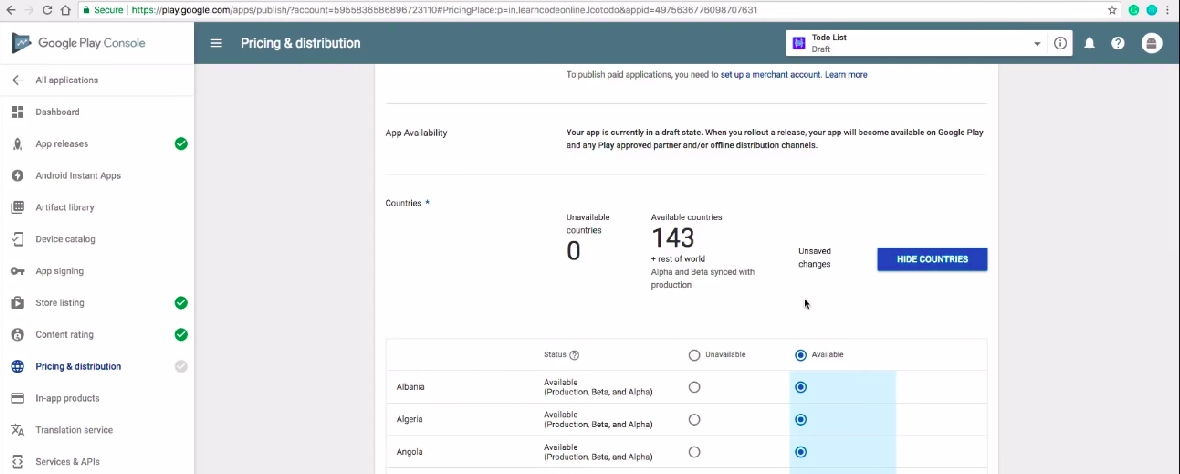
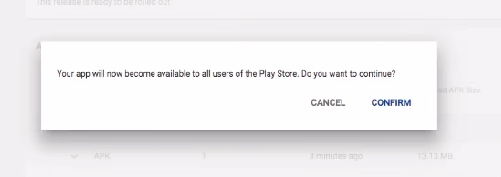
Finally, again go the “App Release” in the right side menu and click on the “ Edit Release” button in the Production Track section and save the details and at the end click “Start role out to production” and click confirm.
The following screen acknowledges your process is ended.
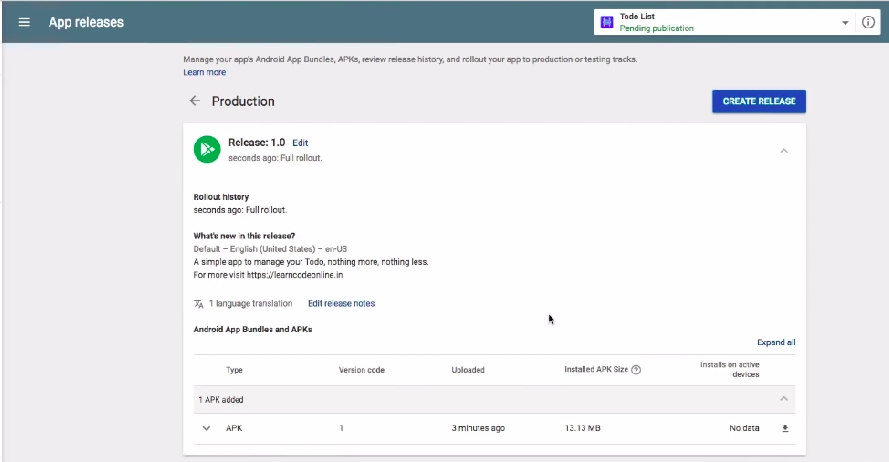
That is all about uploading APK to the play store. You can check the status of the application on the right side menu under the “ All Application”. It takes some hours to appear in the play store. Wait for the APK to appear in the play store. We can also check the details of the APK in the Dashboard.
![]() All content on this page by eGov Foundation is licensed under a Creative Commons Attribution 4.0 International License.
All content on this page by eGov Foundation is licensed under a Creative Commons Attribution 4.0 International License.
Was this helpful?